Tuesday, March 31, 2009

Glass block and Chickens

This evening, I'm feeling a little better, but still not allowed by DH to get up and do anything, so I decided to paint a little, I had finished the painting on this Sunday night or should I say Monday morning. Couldn't sleep wondering what the Dentist was going to do....
This is a oblong glass block I found when I went Junkin' with my Sis in Clinton several months ago
It had one end cut complete out, instead of just a hole drilled in it for a light fixture, I couldn't figure out why until I started cleaning it up and realized someone had used it for a mini fish tank, probably for a Beta Fighting Fish. But any how I think instead of using a plug in type fixture I am going to use a battery powered string of lights in it. I'll cover up the hole like this.
I decided to make this 2 sided where for everyday you could use one side and then this Winter you can turn it around and use the other side. I painted my white Hen and Rooster on the first side and put a red and white checked ribbon around it.
Now isn't this the cutest thing, just imagine this on a small table in your Breakfast room or on the bar in your kitchen or even your den...
OK, I'll surprise you with the other side when I finish it.

Repeat on how to add design to soaps

This is a copy of a post I did when I first started bloggin, several people have emailed me asking how I did my soaps so I thought I would repost it here on my painting blog...
Posted Jan. 6, 2009
Since the Holidays have passed I know a lot of you are looking for something new to craft, Here are the directions for the way I do my soaps...in case anyone else is interested too. This is a recipe that a friend on anotherboard gave me, she said her mother gave it to her. Thanks Linda....These make such cute and personal gifts. I have used pictures of my family and friends also used items I had painted, by printing them out and using them.
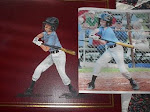
This is a picture of the Seniors on My Grandson's Baseball team last year. I made each one of them a soap for their little happy and remembence of the team.

The second one is Keifer and his Dad 18 yrs ago. Keifer gave it to his dad for Father's Day this year.

Morgan gave these to her teachers as end of year gifts

This is a print of my art work

Sample of the handpainted soaps
Frist....DO NOT.... use Ivory soap. It has too much lotion in it andis too soft. Just won't last, (I learned the hard way).. I only use Pure and Natural. I use canning wax on the soaps. Clean the bar with alcohol, then dip the tops, in about 1/4 in. deep hot wax. I use an old shallow skillet for this--something with low sides, and use a pair of tongs to hold the soap.when the wax is set, in about 5-6 hours (dries sooner but it is recommended to let wax sit that long), add coat of Modge Podge, then add your decal or picture let dry, another coat of Modge Podge, and finish with another coat of wax. If using a picture that you print on your printer it is recommended that you spray with a clear sealer and let dry for 3-4 hrs or over night or the modge podge will cause the ink to bleed. I would print out my pictures, spray them and then do my dipping that way they are ready at the same time. Be sure to size your print to the size of the soap bar before printing. I also do my handpainted this way... follow the same steps as if you were going to add prints, but after adding modge podge and letting it dry good, you can start painting on your design, may take a couple of coats of paint, let dry between each coat. I usually paint a solid base coat over whole top of soap then paint design on that....when paint is totally dry coat with modge podge again. Let dry then dip in wax, BUT do not let it stay in wax too long and do not dip more than once or your paint might just melt off. I usually dip about 12 bars at a time, that way when I need a gift in a hurry I have the prep work done and all I have to do is add art work.Get the wax at the grocery store. I find it on the isle with the candymaking supplies. Or with the canning supplies.There is a method of painting soap that doesn't call for wax. I have justcleaned the soaps good with alcohol and sealed it with clear spray sealer and then paint your design, when dry, seal again with clear sealer.
The wax and modge podge makes it easier to use if you wanted to.... and protects the paint better. Place in clear bag and tie with ribbon or string, add gift tag with instuctions on how to use. Soap is usable if used from the bottom up. Do not leave setting in water. Wet and rub soap on rag. Decal will last till soap is gone.

Monday, March 30, 2009

Yay...I'm so excited

Well, as most of you know I finally started painting again. I listed a breadbox on Ebay and just a short time later I check and I already have a bid, now great is that. It's only 1 bid right now but I do have 3 watchers and 6 days to go. Hopefully it will go up more. If not at least someone liked it.
Today I'm headed to the Dentist, broke a tooth of last night, gads, it already had a crown on it. How does that happen, I thought crowns were suppose to protect it from breaking?
I started working on a block light night. Will show you when it is finished.....I will say it is going to be 2-faced.
Later y'all have a great day.
Molly

Saturday, March 28, 2009

Here's a video on how to draw....

Thanks to Tammy at http://www.mississippihandpaintedkeepsakes.com/ for telling me about it...

What I'm working on right now

Last year when DH and I were looking around the State...we love to just get in the car, choose a direction and just drive and "look" around the state if we see something or some place that looks interesting, we will stop and check it out. Well last year we ran across and old barn like Flea Market, kind of junky if you know what I mean, and it made my heart jump with joy...lol...my kind of place to look for those special little treasure nobody else wants.
I found an old tin breadbox, that I have to admit looked like it had seen it's best days. I had a picture of it, but have misplaced it over the year. Computer has crashed 2 times, love the lightening in the south.
But anyways take my word for it, it was not good. DH used his sandblaster and got all of the rust of and most of the loose paint. I spray painted it white, trimmed it in red and painted my own design of a Hen and Rooster Couple on the front. I haven't finished it yet I plan to stencil BREAD on the top, hand shakes too much to just try and print it...ahhh old age...lol...
When I finish it I will be listing in on EBay. I have a lot of luck and good followers on my Chicken stuff at Ebay.

My Etsy

I decided to start painting again after much encouragement by some old friends and some new ones I met here in blog land. I had just walked off and left my Etsy store unattended, how bad of me, but when I went back to check it out it was setting there like a true friend waiting for me to come to my senses and return to it. Well I did a little spring cleaning and got it all spic and span and have even listed a couple of items, a couple of Snowmen lite bulb ornies that are on sale, both are included for one price and can be personalized for you....

and my pretty lady painted vintage platter. I will be working on more items to list, plus will be working on some of my Chicken items to reopen my Ebay Store will post a link to Ebay when I get it up and running again. Thanks for stopping by...


what I'm doing now

I have decided that trying to do my regular blogging and my painting on the same blog is too much and confusing. I am a busy TALKATIVE lady...lol..and doing so many post each day about a little of this and a little of that, some of my painting is getting buried...so I decided to separate them...this blog is to show what I am working on and maybe even a pictorial of how to's thrown in every now and then. I hope you will come to visit me and also my other blog...I appreciate my friends, I have been made quite welcome in the 3 mos. I have been blogging.
Thanks

Molly